
Here are some simple steps to restore the data, please read it carefully to operate.


Step 1. Connect Your Samsung S5 to computer
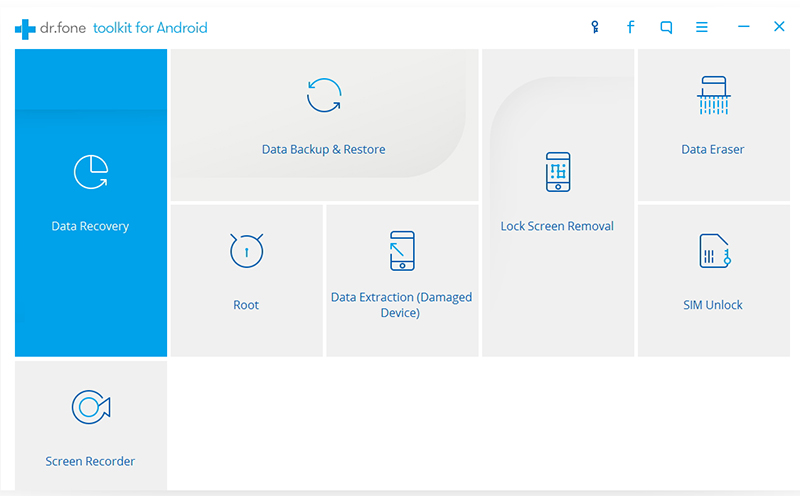
First of all, you have to dowmload, install and run Android Data Recovery on your computer in advance. At the same time, connect your phone to computer with a USB cable. Then select Data Recovery among all the toolkits.
Note: If your Android os version is 4.2.2 or above, there will be a pop up message on your Android phone, tap on OK to allow USB debugging.
Step 2. Select file types to scan
When the phone and the computer are connected successfully, the software displays all the data types that can be recovered. Find the type of data you want to restore, and select it. And then click "Next" to continue the data recovery process.

Step 3. Scan your device to find the lost data on it
The next step is to select the scan mode, which is divided into "Standard mode" and "Advanced mode", you can read the instructions to understand the difference between them and choose one of them. We recommend that you use the "Standard mode" first because it has a faster speed. if you can not find the data you want, then select "Advanced mode". Now, click "start" to scan your phone.

Note: There might be a Superuser authorization appearing on your device during the scan. If you get it, click "Allow" to continue.
Step 4. Previewing to Recover Your Data
When the scan is complete, you can preview the found data one by one. Check the contacts and messages you wanted, and click "Recover" to save them all back to your computer.

More Related Articles:
How to Recover Data from Android Phone When Got Wet
Tq for sharing vauable infromation,
ReplyDeleteTo recover the lost files click on:
diskdigger for android
smartphone data recovery
android data recovery without root
android data recovery review
launch android data recovery