9.14.2017

How to Recover Data from Factory Reset Samsung Note 8

In general, in many electronic digital products, you can see "restore factory settings" in the settings. Restoring factory settings is very meaningful. So what's the advantage of restoring factory settings? By factory reset, we can restore the operation inside the device to its original state. Generally speaking, the factory settings in the phone are the most common and more general settings, which can meet the majority of people's habits, but also to meet the majority of the use of occasions.

Other than that, it has the power to repair your phone. Such as some software can not uninstall, the screen is not bright, automatic restart, automatic shutdown, as well as mobile phones appear in a variety of other bug, we can first consider restoring factory settings. In a simple way, restoring factory settings means getting the device back to the most primitive state you just bought.


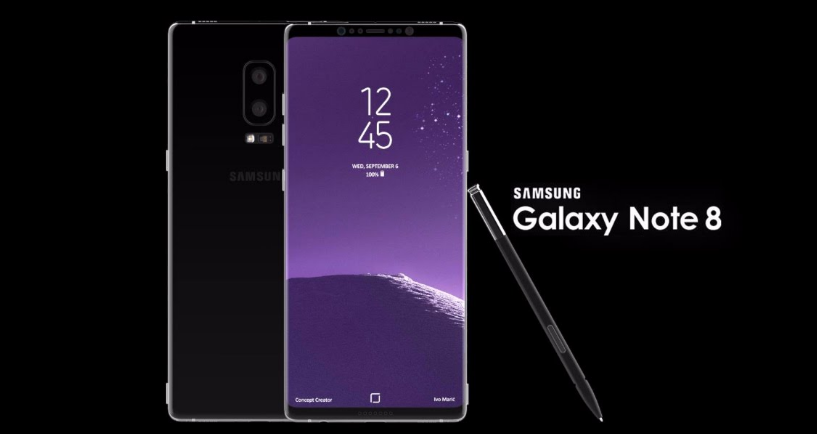
However, factory reset can also bring some problems. My friend told me his distress. He made a factory reset for his Samsung Note 8, but he did not consider the phone data will be deleted after the factory reset, he did not back up the important data from the Samsung Note 8. So he now needs to recover the deleted data.

In this case, you can use the dr.fone toolkit - Android Data Recovery to recover the deleted data. This is a professional data recovery software, even if your Samsung Note 8 has been restored factory settings, you can still restore the deleted data. And it can be used not only for Samsung Note 8, but also for Samsung other models phones, HUAWEI, ZTE, LG, OPPO, vivo, SONY and other Android mobile phones. And you can recover deleted photos, videos, contacts, phone calls, history, text messages, audio, WhatsApp and other data on your phone. More importantly, you'll only have to spend a few minutes to recover the data. Moreover, its steps and operations are simple and easy to understand.


Step 1. Connect Your Samsung Note 8

Download and launch dr.fone toolkit for Android on your computer, and select Data Recovery among all the toolkits.

Next, use the USB line to connect your Samsung Note 8 to your computer and turn on the USB debugging. The program pops up a message to remind you to open USB debugging.


If your Android os version is 4.2.2 or above, there will be a pop up message on your Samsung Note 8, tap on OK to allow USB debugging.


Step 2. Select Data from yourSamsung Note 8

Then, when the program detects your Samsung Note 8, you enter the new windows, and please check the file type according to your needs. Then you can click "Next".


Step 3. Scan your device to find the lost data on it

As shown below, the program will provide two modes for you to choose, one is the standard mode, the other is the advanced mode. Please choose one according to your needs. Then, click on "Start". The program begins to analyze and scan your Samsung Note 8.


Note: There might be a Superuser authorization appearing on your device during the scan. If you get it, click "Allow" to confirm it. If not, just forget it.


Step 4. Recover data from your Samsung Note 8

The program starts scanning the file, and after this process, you can preview the scanned file. When you find the data you need, check them and click "Recover".


More info:

Recover Data from Samsung with Broken/Death Screen

9.08.2017

How to Fix Red Screen On Samsung Galaxy S8?

Is the Samsung Galaxy phone that screen red screen incorrigible? Every year, we recycle tens of thousands of second-hand Samsung Galaxy phones from the secondary market. These Samsung Galaxy phones have a variety of problems. Some are system failures, and some are hardware failures. They are repairable, but many users are too lazy to expend their energy and effort to fix them. In fact, many phones can continue to be used as long as they have been properly repaired. For example, Many users feel they can't fix the Samsung Galaxy phones that screen red screen. However, as long as we use the right method, we can fix it and the phone's data files recovered in good condition.


So, what are we going to do to fix the Samsung Galaxy phone that screen red screen and restore the data in the phone?

dr.fone toolkit - Android Data Extraction (Damaged Device) can help you fix your Samsung Galaxy phone that screen red screen. It has enough power to repair your Samsung Galaxy phone and extract data from your phone onto your computer. You only need to spend a few minutes. Its steps are simple, and each step has a corresponding explanation that anyone can understand. More importantly, it will not damage your phone data, they will be perfect protection, and be safely restored to the computer. The software can be used in all types of Samsung Galaxy phones, including the Samsung Galaxy Note series, Samsung Galaxy S series, Samsung Galaxy Tab series and so on.


Step 1. Install and run dr.fone toolkit for Android

First you need to download the dr.fone toolkit for Android on your computer, and then run it. At the same time, please use the USB cable to connect your Samsung Galaxy phone to your computer. As the following figure shows, the program has some options; you need to select "Data Extraction (Damaged Device)".


Step 2. Selecting file types to recover

Next, the program will go to the next window. You need to select the type of file you want to restore, and then click "Next". Here, the program will choose all files by default, if you only need a specific file; you can cancel the other types of check.


Step 3. Select the fault type which matches your situation

There are two types of fault of the Samsung Galaxy phone, which are Touch does not work or cannot access the phone, and Black/broken screen. Just click on the one which you have. Then it will lead you to the next step.


Then on the new window, choose the correct "Device Name" and "Device Model" for your phone. Currently this function only works for some Samsung devices in Galaxy S, Galaxy Note and Galaxy Tab series. Then click on "Next".


Step 4. Enter Download Mode on the Samsung Galaxy phone

Then you'll need to manually do a few steps on your Samsung Galaxy phone. Your phone will go into Download Mode.

Power off the phone.

Press and hold Volume "-", "Home" and "Power" button on the phone.

Press "Volume +" button to enter download mode.


Step 5. Analyze the Android phone

When your Samsung Galaxy phone has successfully entered the download mode, the program will begin scanning and analyzing your phone and downloading the recovery package.


Step 6. Preview and recover the data from Samsung Galaxy phone

Finally, the process has been completed. So the scanned data is displayed on the window, and you can select and restore them to the computer. Just check out what you need to restore and click "Recover".


More info:

Recover Data from Samsung with Broken/Death Screen

9.06.2017

How to Recover Lost Data from Factory Reset Samsung S8

A factory reset is the restoration of an Android device to the state it was when it left the factory. As a result, all the settings, applications, and files that have been added to the device by users will be removed. Factory reset is an important feature that supported by all mobile devices running Android operating system. You can do it to fix some system errors, speed up your phone or clean up privacy information when you want to give the phone away. However, you might perform factory reset by mistake and lose important data such as photos, contacts etc. Want to recover data after factory reset Samsung S8? This following method might help you.


dr.fone toolkit for Android is an outstanding data recovery software, which is widely used by the vast majority of Samsung Galaxy users. With its help, user can recover lost and deleted data including call logs, photos, videos, audios, contacts, WhatsApp messages and so on from almost all Samsung Galaxy devices and SD cards. Moreover, the software also allows you to recover lost data from a broken/damaged Samsung, or the Samsung with cracked/death/blank screen. Besides, with the help of dr.fone toolkit for Android, you are allowed to backup & restore your Samsung data, unlock your Samsung, fix the bricked Samsng and root your Samsung without losing data. Next, we will introduce how to recover contacts from the Samsung Galaxy S8 via this easy-to-use recovery tool.


Step 1. Choose the Recovery Mode and Connect Your Phone

First of all, please download, install and run the Samsung Data Recovery on your computer. Then choose the mode of "Android Data Recovery" on the program's interface and connect your Samsung Galaxy S8 to your computer.


In order to let the program smoothly detect your phone, please allow the USB debugging on your phone's screen. If done, the software will recognized your Galaxy S8 soon.


Step 2. Select the File Types to Scan

After your computer test your device successfully, you will be asked to select the type of files you want to recover, just select those what you wanted and click on "Next".


Step 3. Choose the Scanning Mode to Scan Your S8

On the next screen, you can see there are two scanning modes providing to scan your lost data, respectively are the "Standard Mode" and the "Advanced Mode". To save your time, you can try the "Standard Mode" firstly, if you can't find the lost data, then choose the "Advanced Mode" later. After that, click on "Start" to scan your Galaxy S8 for the lost data.


Note: The scan will not spend too much of your time, just depend on the amount of your data, please patience to wait for the scan is complete.


Step 4. Preview and Recover Deleted Data on Samsung S8

When the scan is finished, all the scanning result will be listed in different categories, you can check any of them on the left sidebar and preview the details on the right side. At the same time, select those what you like, and click on "Recover" to save them on your computer.


Note: If there is no other needs , please don't disconnect your phone in the process of the whole data recovery.

More info;

How to Recover Deleted Pictures from Samsung S8


How to Unlock Samsung Galaxy Tab Lock Screen

Nowadays, people's awareness of privacy protection arises, which causes the existence of screen lock. Screen lock, a safe guarantee for all the personal data stored on our mobilephone, includes PIN, patterns, password and fingerprint. But along with the appearanxe of screen lock, the problem that forgetting the screen lock also exists and troubles plenty of people. Actually, there are many ways to remove the lock. But generally you have to run the risk of data loss no matter which methods you choose.

But here, I am going to introduce a helpful tool called dr.fone toolkit for Android, which is known for data recovery, has invent an new function - Android Lock Screen Removal. The program can perfectly meet the need of unlock the screen lock for your Samsung smartphones & tablets without losing any of your data.


dr.fone toolkit for Android is a data recovery program covered over 6000 Android phones and tablets from Samsung, HTC, LG, Sony, Motorola, ZET, Huawei, etc. The list of supported devices is still growing rapidly. dr.fone toolkit for Android sounds a pretty professional thing. Really, but people without any professional computer skills can handle it easily. All you need to perform is just three baby steps.

Even the screen turns black, you are unable to open the USB debug, forget the lock screen password, or just can't enter the phone's system for unknown reasons. There is still a chance for you to retrieve the data on it with this Android data recovery software.

Take Samsung Galaxy Tab as an example, let me show you the new function. The particular of How to Unlock the Screen Lock on Samsung Galaxy Tab.


Step 1. Choose "Android Lock Screen Removal"

First, launch dr.fone toolkit for Android and you will see four functions are listed on the left column. Here, you should go to choose "Lock Screen Removal". Then connect your Samsung Galaxy Tab to the PC via a USB cable and click "Start" to begin.


Step 2. Enter the Download Mode on Your Samsung Galaxy Tab

Simply follow the instructions on the program to get your phone into Download Mode. With the help of the photos showed along on the window, it will be easier.

1) First of all, put your Samsung Galaxy Tab power off.

2) Press and hold volume "-" & "Home" button & "Power" button simultaneously on your phone.

3) Press the volume "+" to enter download mode for your device.


Step 3. Download Recovery Package

After you get your device into the download mode, by default, the program will automatically download the corresponding recovery package for your Samsung Galaxy Tab. You need to wait for a while with patience until it's finish, it won't spend too mush of your time.


Step 4. Remove Android lock screen without losing data

The Android lock screen removal begins as soon as the recovery package downloading is complete. This process will not hurt any of your phone data. When the program of unlocking is finish, you can use your Samsung Galaxy Tab or tablet dispense with entering any password, and view all your files on the device without any restriction.


More info:

How to Unlock on Samsung Galaxy Tab

8.23.2017

How to Recover Deleted/Lost Data from Samsung Galaxy S8/S8+

As is known to all, Samsung Galaxy S8/S8+ regularly ask you to upgrade its system. Under normal circumstances, after a period of use, the Samsung Galaxy S8/S8+ system will gradually show some of its own bugs and defects. These bugs and defects cannot meet the growing requirements of phone. Therefore, mobile phone developers must regularly or irregularly repair and correct the bugs and defects of the system itself. This gives rise to a new system version to meet the new requirements. However, the updating of the phone system is not as simple as imagined. If there is an error during the upgrade, this can cause serious trouble. The most common problem is the loss of phone data after upgrading the system. So, when the data in Samsung Galaxy S8/S8+ is lost, how can we restore the data?


You can use dr.fone toolkit - Android Data Recovery to recover lost data. It can cope with various data recovery scenarios, in addition to lost data due to system upgrades, as well as lost data after factory restore, after Rooting or ROM flashing and so on. In addition, it is compatible with more than 6000 Android devices, in addition to Samsung Galaxy S8/S8+, it also supports HUAWEI, ZTE, LG, SONY, vivo, OPPO, Lenovo, and so on. It support you restore a variety of data, including photos, music, text messages, video, contacts and other data. More importantly, you can easily use this software, just a few simple steps you can recover deleted or lost data from samsung s8.


Step 1. Connect your Samsung Galaxy S8/S8+

Please download and run dr.Fone toolkit for Android on the computer, and then find and click "Data Recovery" from the main interface.

Next, connect your Samsung Galaxy S8/S8+ to your computer with a USB cable. When connected, you also need to open the USB debugging on your Samsung Galaxy S8/S8+ to allow the program to manage your phone.


If your Android os version is 4.2.2 or above, there will be a pop up message on your Android phone, tap on OK to allow USB debugging.


Step 2. Select file types to scan

When you open the USB debugging, the program will enter the next interface, this time you need to select the files you want to scan. Then, click on the "Next".


Step 3. Scan your Samsung Galaxy S8/S8+ to find the lost data on it

Next, you should choose the way of scanning. You can choose "Standard Mode" or "Advanced Mode". If your request is not high, we recommend that you try the "Standard mode", it works faster. If it does not work, you can try the "advanced mode". Then, click "Start".


Note: There might be a Superuser authorization appearing on your device during the scan. If you get it, click "Allow" to confirm it. If not, just forget it.


Step 4. Preview and recover deleted data on Samsung Galaxy S8/S8+

When the scan is over, you can preview and select the data to restore. When you find the data you need, check it out, and finally click "Recover" to save them all on your computer.


More info:

Recover Deleted Text Messages from Samsung S8/S8 Edge

How to Recover Deleted Pictures from Samsung S8

Samsung Note series is very popular, but I prefer the S series. And my S8 was only used for a few months, so I didn't plan to follow the trend to buy Note 8. But lately I've been in a muddle. Because the pixels of the Samsung S8 are good, I often record the life of my family and my travels. So there are a lot of photos saved in the Samsung S8. But, today when I was sorting out my Samsung S8 photos, I accidentally deleted all the photos. As for me, pictures are the best recorders of the time. So when they were deleted, I'm sad, can I retrieve the deleted pictures?


As long as you're not using professional software to delete photos from Samsung S8, they are all recoverable. You can use dr.fone toolkit - Android Data Recovery to retrieve deleted photos. The software can be used in all types of Android phones, including Samsung S8, Samsung S8+, HUAWEI, ZTE, LG, SONY, vivo, and so on. In addition to photos, it can also be used to restore text messages, contacts, music, video, audio, call history, Whatsapp, and other data. What's more, its steps are simple and convenient, and you can easily restore photos with your own power.

Well, I'll explain how to use dr.fone toolkit - Android Data Recovery to recover deleted photos from Samsung S8/S8+.


Step 1. Download dr.fone toolkit for Android

First of all, please download and install dr.fone toolkit for Android to your computer as prompted. Next, double-click the icon of the software to run it, and find and click "Data Recovery" from the main screen.


Next, please prepare a USB line to connect the Samsung Galaxy S8/S8+ to the computer, while you also need to open the USB debugging on your Samsung Galaxy S8/S8+.


If your Android os version is 4.2.2 or above, there will be a pop up message on your Android phone, tap on OK to allow USB debugging. 


Step 2. Select the type of file you want to restore

You need to select the type of file you want to restore. When the program identifies your Samsung Galaxy S8/S8+, it will show you the file type can recover. You need to check what you need. On this issue, you need to check the photos. And then click "Next".


Step 3. Scan your Samsung Galaxy S8/S8+ to find the lost data on it

You also need to select the scan mode. As you can see, the program provides two modes, one is the "Standard mode", and the other is the "Advanced mode". I recommend "Standard mode" because it works faster. Check what you need, click "Start".


Note: There might be a Superuser authorization appearing on your device during the scan. If you get it, click "Allow" to continue. If not, just skip this step.


Step 4. Preview and recover deleted photos

When the scan process is over, you can begin to recover the data. All the data will be displayed in the window, so you can preview them one by one. Then tick the photos you need to recover and click "Recover".


More info:

Recover Deleted Files from Samsung S8/S8 Edge

How to Recover Call history from Samsung S8